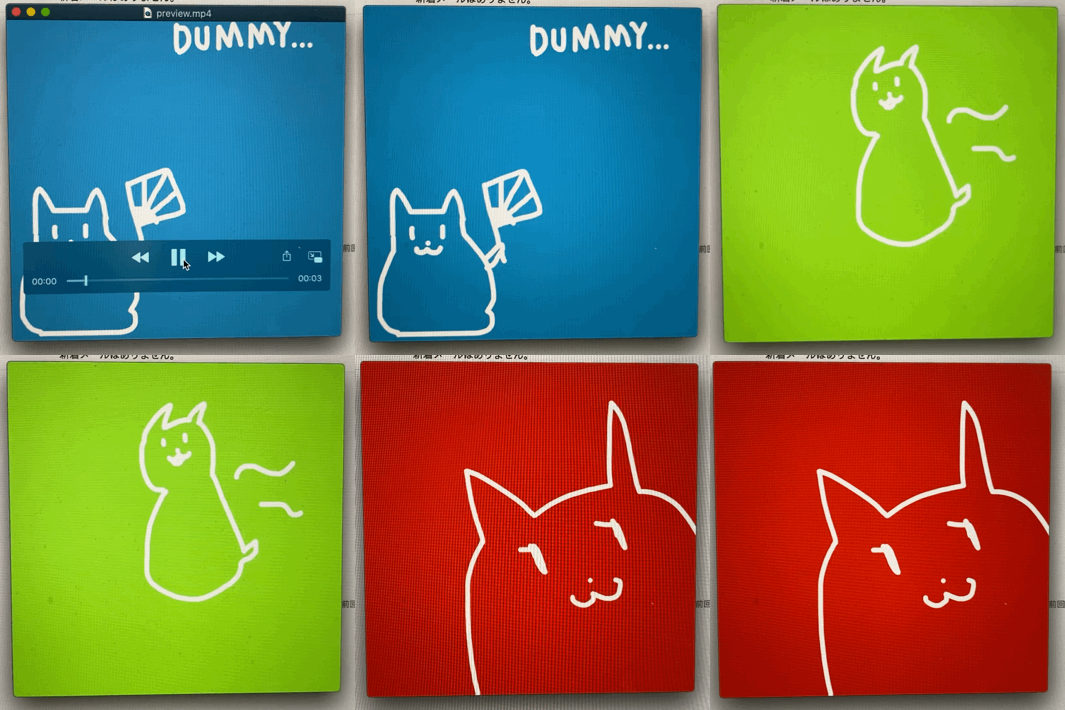
動画生成について知識を深める必要がでてきました。まずは簡単なところから始めるべく複数枚の静止画から動画(mp4)を生成しました。Xcode 11.3.1 / Swift 5.1を使って実装しています。
事前準備
事前に用意したものは3枚の静止画です。1024 x 1024 ピクセルのPNG画像です。
複数枚の静止画から動画(mp4)を生成する
ボタンがタップされたら複数の静止画(PNG)をつなぎ合わせて1枚の動画(mp4)を生成します。
import UIKit
import AVFoundation

//...

@IBAction func buttonAction(_ sender: Any) {

    // 動画にする画像 (R.swift使ってます)
    let images: [UIImage] = [
        R.image.dummy_blue()!,
        R.image.dummy_green()!,
        R.image.dummy_red()!
    ]

    // 生成した動画を保存するパス
    let tempDir = FileManager.default.temporaryDirectory
    let previewURL = tempDir.appendingPathComponent("preview.mp4")

    // 既にファイルがある場合は削除する
    let fileManeger = FileManager.default
    if fileManeger.fileExists(atPath: previewURL.path) {
        try! fileManeger.removeItem(at: previewURL)
    }

    // 最初の画像から動画のサイズ指定する
    let size = images.first!.size

    guard let videoWriter = try? AVAssetWriter(outputURL: previewURL, fileType: AVFileType.mp4) else {
        abort()
    }

    let outputSettings: [String : Any] = [
        AVVideoCodecKey: AVVideoCodecType.h264,
        AVVideoWidthKey: size.width,
        AVVideoHeightKey: size.height
    ]

    let writerInput = AVAssetWriterInput(mediaType: AVMediaType.video, outputSettings: outputSettings)
    videoWriter.add(writerInput)

    let sourcePixelBufferAttributes: [String:Any] = [
        AVVideoCodecKey: Int(kCVPixelFormatType_32ARGB),
        AVVideoWidthKey: size.width,
        AVVideoHeightKey: size.height
    ]
    let adaptor = AVAssetWriterInputPixelBufferAdaptor(
        assetWriterInput: writerInput,
        sourcePixelBufferAttributes: sourcePixelBufferAttributes)
    writerInput.expectsMediaDataInRealTime = true

    // 動画生成開始
    if (!videoWriter.startWriting()) {
        print("Failed to start writing.")
        return
    }

    videoWriter.startSession(atSourceTime: CMTime.zero)

    var frameCount: Int64 = 0
    let durationForEachImage: Int64 = 1
    let fps: Int32 = 24

    for image in images {
        if !adaptor.assetWriterInput.isReadyForMoreMediaData {
            continue
        }

        let frameTime = CMTimeMake(value: frameCount * Int64(fps) * durationForEachImage, timescale: fps)
        guard let buffer = pixelBuffer(for: image.cgImage) else {
            continue
        }

        if !adaptor.append(buffer, withPresentationTime: frameTime) {
            print("Failed to append buffer. [image : \(image)]")
        }

        frameCount += 1
    }

    // 動画生成終了
    writerInput.markAsFinished()
    videoWriter.endSession(atSourceTime: CMTimeMake(value: frameCount * Int64(fps) * durationForEachImage, timescale: fps))
    videoWriter.finishWriting {
        print("Finish writing!")
    }
}

func pixelBuffer(for cgImage: CGImage?) -> CVPixelBuffer? {
    guard let cgImage = cgImage else {
        return nil
    }

    let width = cgImage.width
    let height = cgImage.height

    let options = [
        kCVPixelBufferCGImageCompatibilityKey: true,
        kCVPixelBufferCGBitmapContextCompatibilityKey: true
    ] as CFDictionary

    var buffer: CVPixelBuffer? = nil
    CVPixelBufferCreate(kCFAllocatorDefault, width, height,
                        kCVPixelFormatType_32ARGB, options, &buffer)

    guard let pixelBuffer = buffer else {
        return nil
    }

    CVPixelBufferLockBaseAddress(pixelBuffer, CVPixelBufferLockFlags(rawValue: 0))

    let pxdata = CVPixelBufferGetBaseAddress(pixelBuffer)
    let rgbColorSpace: CGColorSpace = CGColorSpaceCreateDeviceRGB()
    let context = CGContext(data: pxdata,
                            width: width,
                            height: height,
                            bitsPerComponent: 8,
                            bytesPerRow: 4 * width,
                            space: rgbColorSpace,
                            bitmapInfo: CGImageAlphaInfo.noneSkipFirst.rawValue)
    context?.draw(cgImage, in: CGRect(x:0, y:0, width: width, height: height))
    CVPixelBufferUnlockBaseAddress(pixelBuffer, CVPixelBufferLockFlags(rawValue: 0))

    return pixelBuffer
}
生成された動画ファイルはこんな感じです。

動作確認環境
- iOS 13.4
- Xcode 11.4.1
参考記事
関連記事
iOSアプリ開発Tips/動画編集にて関連した記事をまとめています。
それ以外にも iOSアプリ開発で役立つ情報をまとめています。
